Bee feed syrup pump
Bee feed syrup pump
The feeding period is very strenuous and physically demanding for every beekeeper. The bee feed syrup pump is designed to make feeding the bees much easier.
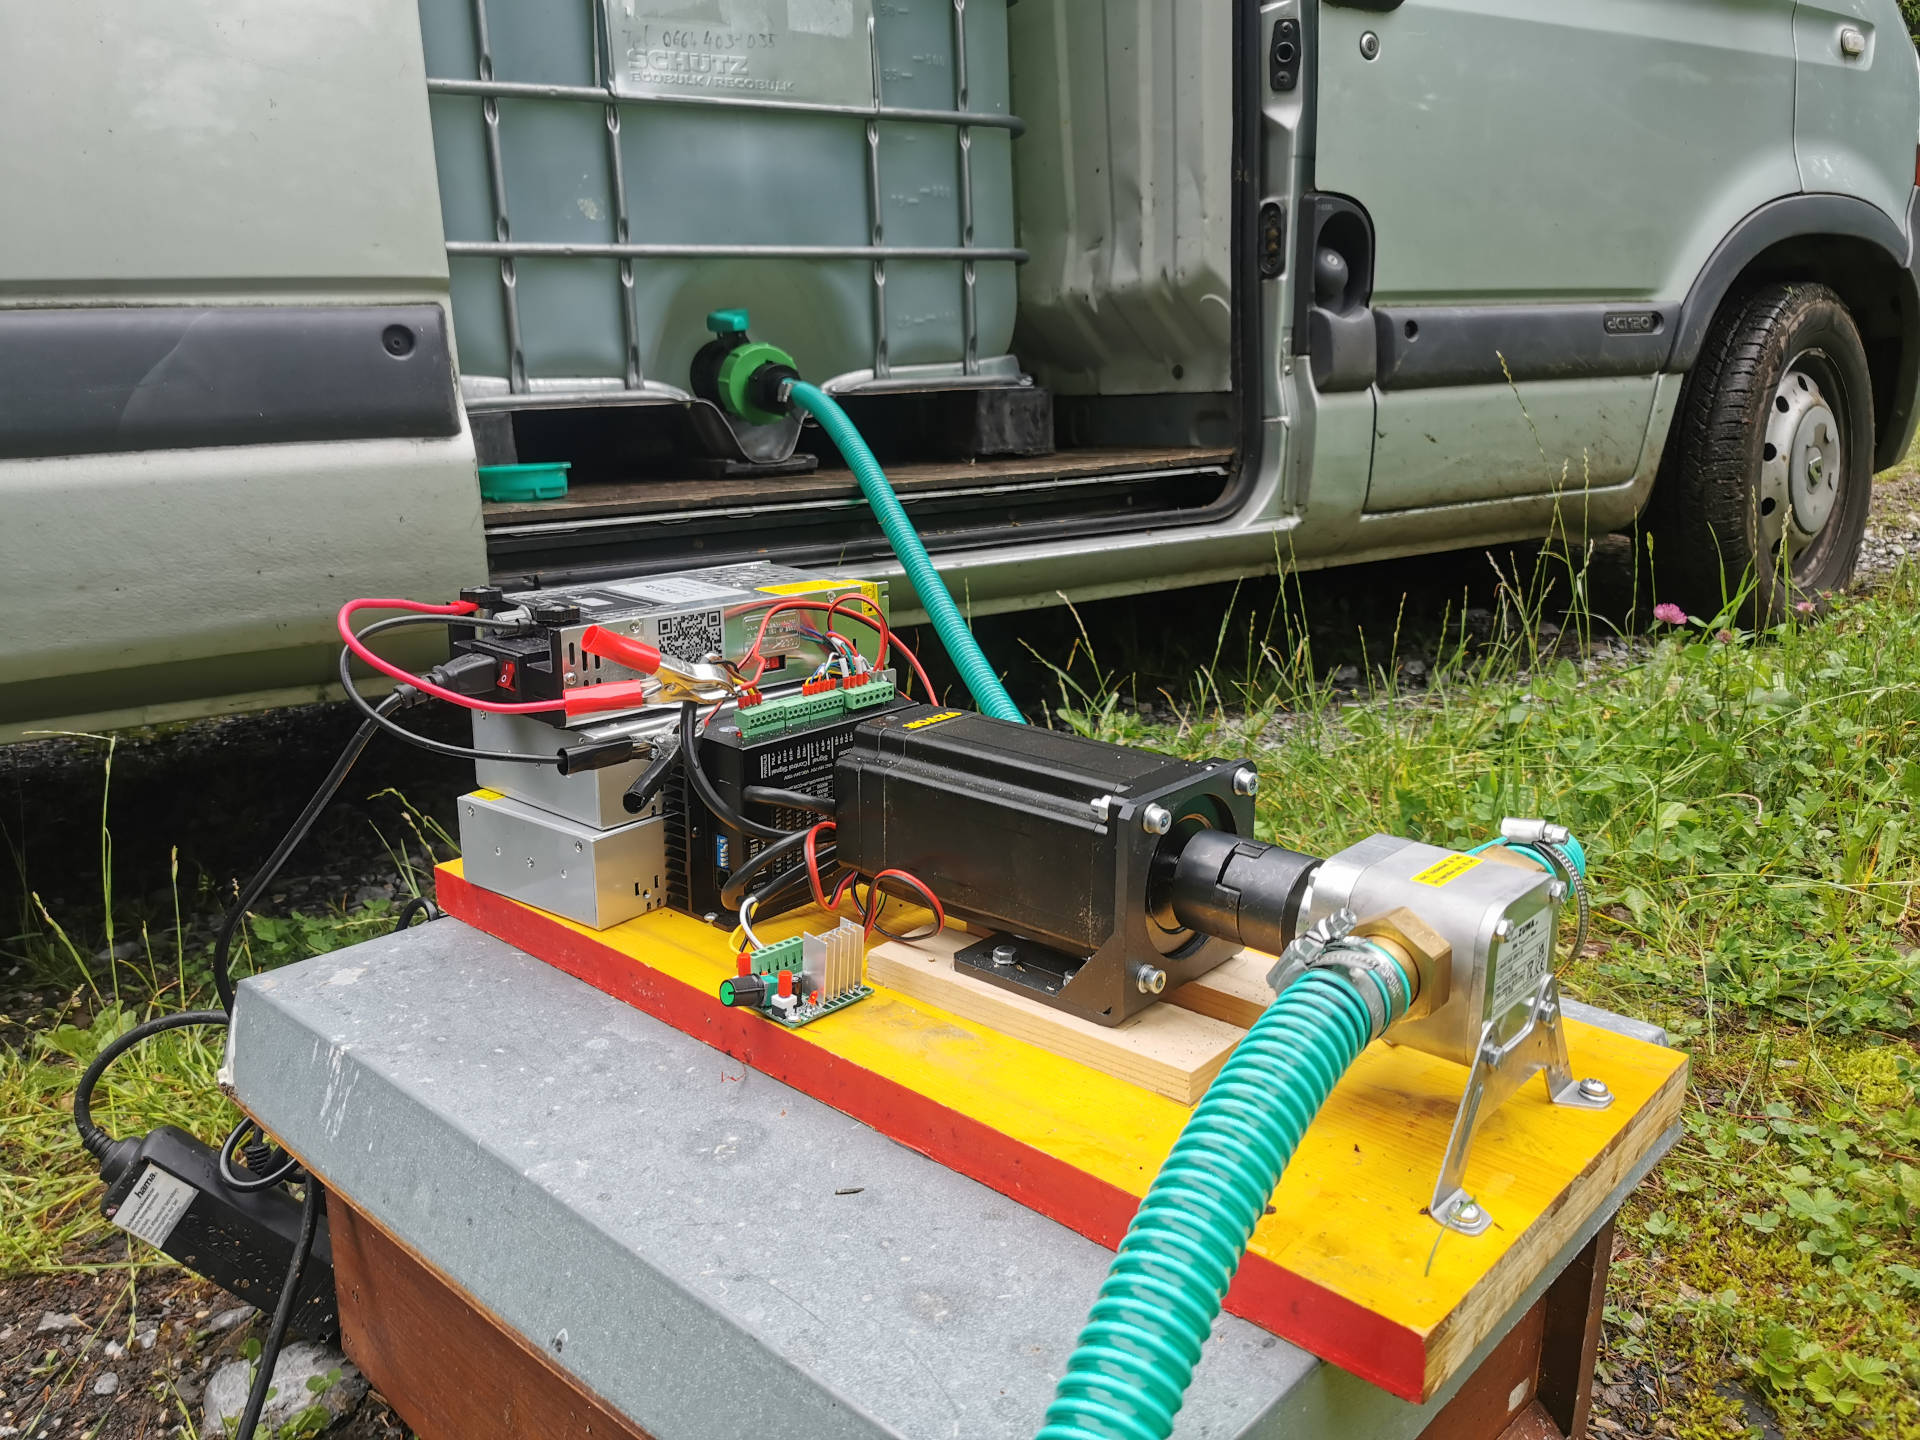
1.) Short description:
The feeding period is very strenuous and physically demanding for any beekeeper. The feed syrup pump is designed to make feeding the bees significantly easier. The feed syrup pump is designed to make it possible to pump the feed syrup or sugar water directly from a tank container into the feeding equipment.
2.) Background and motivation
2.1.) Description of the Problem
The bee feed syrup pump is designed to pump feed syrup or sugar water directly from a tank container into the feeder. Feed syrup is a highly viscous liquid that places special demands on a pump. For viscous liquids, the correct selection and dimensioning of the hose is also crucial.
2.2.) Why is this project important and who benefits from it?
The bee feed syrup pump is designed to significantly ease the physical labor of feeding the bee colonies. Efficient feeding is a great relief for the beekeeper, especially when managing a large number of colonies.
3.) Objectives and expected results
The goal of this project is to build a feed syrup pump that can pump highly viscous feed syrup from a tank container into the feeding trough.
- The feed syrup flow rate should be adjustable, allowing for time-saving and efficient feeding. The flow rate should be adjustable.
- The pump must be capable of being operated with a mobile power source, as it is primarily used to feed outside hives. The required power source should be lightweight and easy to transport.
- The feed syrup pump must also be lightweight and portable.
- The feed syrup pump must be capable of being switched on and off via a remote control.
- The hose must be dimensioned to cover a suitable distance while still remaining practical and easy to use. The hose connections must allow for easy operation of the feed syrup pump.
- The feed syrup pump must be manufactured at a price that is profitable for the beekeeper.
4.) Technical implementation
Initial research and tests showed that the easiest way to create a mobile feed syrup pump is with a stepper motor with a motor driver and an impeller pump. The stepper motor can be operated with 220V, and the motor driver allows for simple speed control with a PWM generator.
5.) Helpful information and basic knowledge
To help you get started quickly with the project, we have compiled the most important information about the individual components (centrifugal pump and impeller pump, stepper motor, stepper motor driver, PWM generator).
6.) Milestones and results
You can find the first results and building instructions here.
7.) Questions and answers
You can ask questions or provide suggestions for this project in the forum. An active community is very helpful for creating a good product as quickly as possible. Please help and become a member of the community for bees and beekeepers.
Bee webcam
Bee webcam
Since many beekeepers can no longer be directly at the apiary as often they want to avoid travel, a bee webcam is an important tool to save time and money.
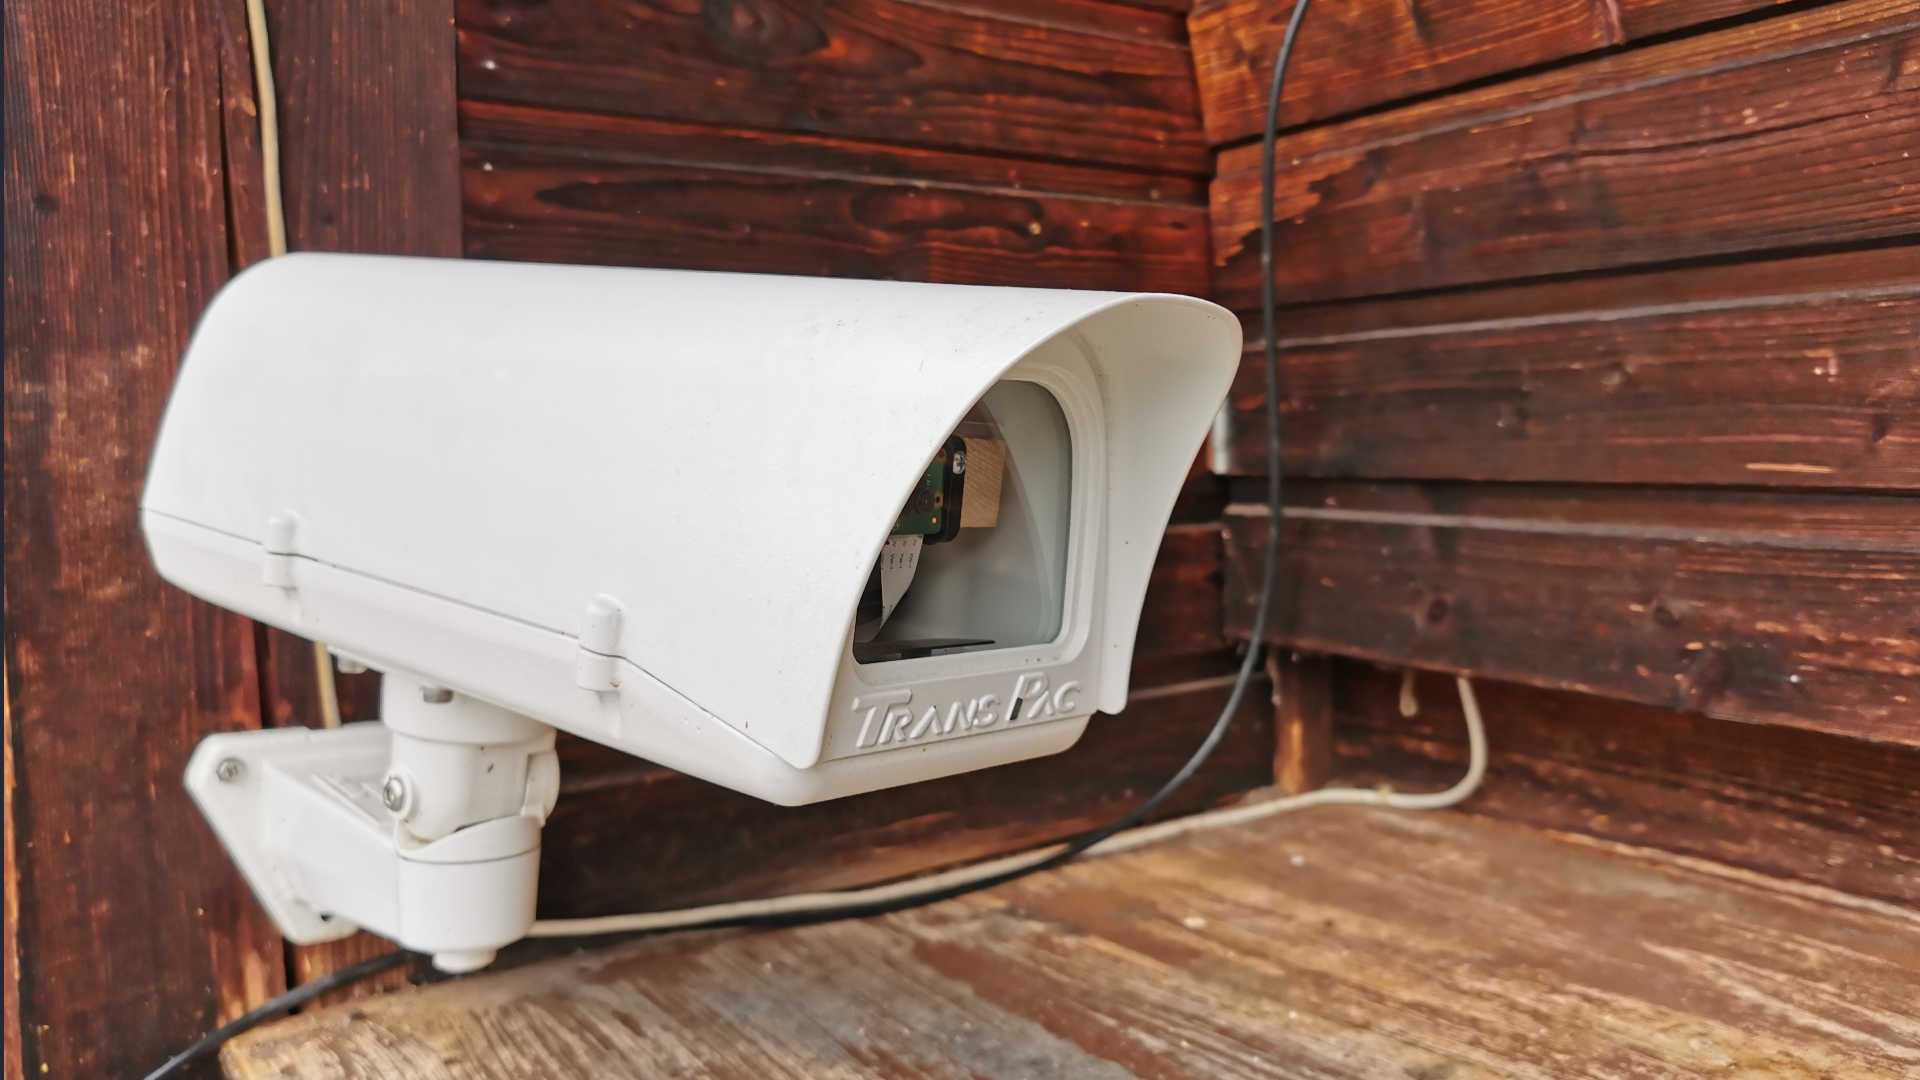
1.) Short description
The bee webcam is designed to enable beekeepers to observe their bees anytime, anywhere. The bee activity at the entrance and in the apiary provides the beekeeper with important information about the health and vitality of the colonies. They can also determine the forage situation at the apiary, thus gaining information about the bees' food supply.
2.) Background and motivation
2.1.) Problem
The goal is to develop a bee webcam that transmits a live stream from the entrance or apiary directly to a web browser. The resolution and frame rate must be high enough to capture important information about the bee flight (bees with pollen bags, foraging flight, etc.). An appropriate power supply must ensure continuous operation of the webcam. The live stream will be transmitted either via Wi-Fi or the mobile network.
2.2.) Why is this project important and who benefits from it?
A bee webcam is useful for all beekeepers who keep their bees away from home. This is especially true for migratory beekeepers or beekeepers with multiple locations. A bee webcam can eliminate many trips to the apiaries, protecting the environment and saving the beekeeper considerable time and money.
3.) Objectives and expected results
The bee webcam should provide a live stream from the hive entrance or apiary. The webcam requires a standalone power supply and a network connection. Depending on the circumstances, a Wi-Fi or cellular connection may be necessary. The video transmission should be encrypted and sent directly to a web browser so that the live stream can be integrated into a website. All necessary software should be license-free.
4.) Technical implementation
A Raspberry Pi with sufficient computing power is required to process the video signal. Various camera modules, with and without interchangeable lenses, are available for the Raspberry Pi. Since various operating systems can be installed on the Raspberry Pi, a wide variety of video processing programs can be installed. An autonomous power supply is also feasible for the Raspberry Pi. Various additional modules can be used for a mobile network connection. A Wi-Fi module is already installed on the Raspberry Pi.
5.) Helpful information and basic knowledge
The Raspberry Pi is a fully-fledged single-board computer with countless possibilities. Virtually all Linux distributions can be installed with a wide range of software packages. Therefore, we've compiled a wealth of information and basic knowledge to make getting started easier.
6.) Milestones and results
-
You can find instructions for building a Wi-Fi bee webcam here.
7.) Questions and answers
In the bee webcam forum you can discuss experiences and problems with the 4Bees developer community.
Weather station
Weather station
Weather and climate have a significant impact on the development and health of our bees. Weather trends and their impact on our bees are of particular interest to every beekeeper.
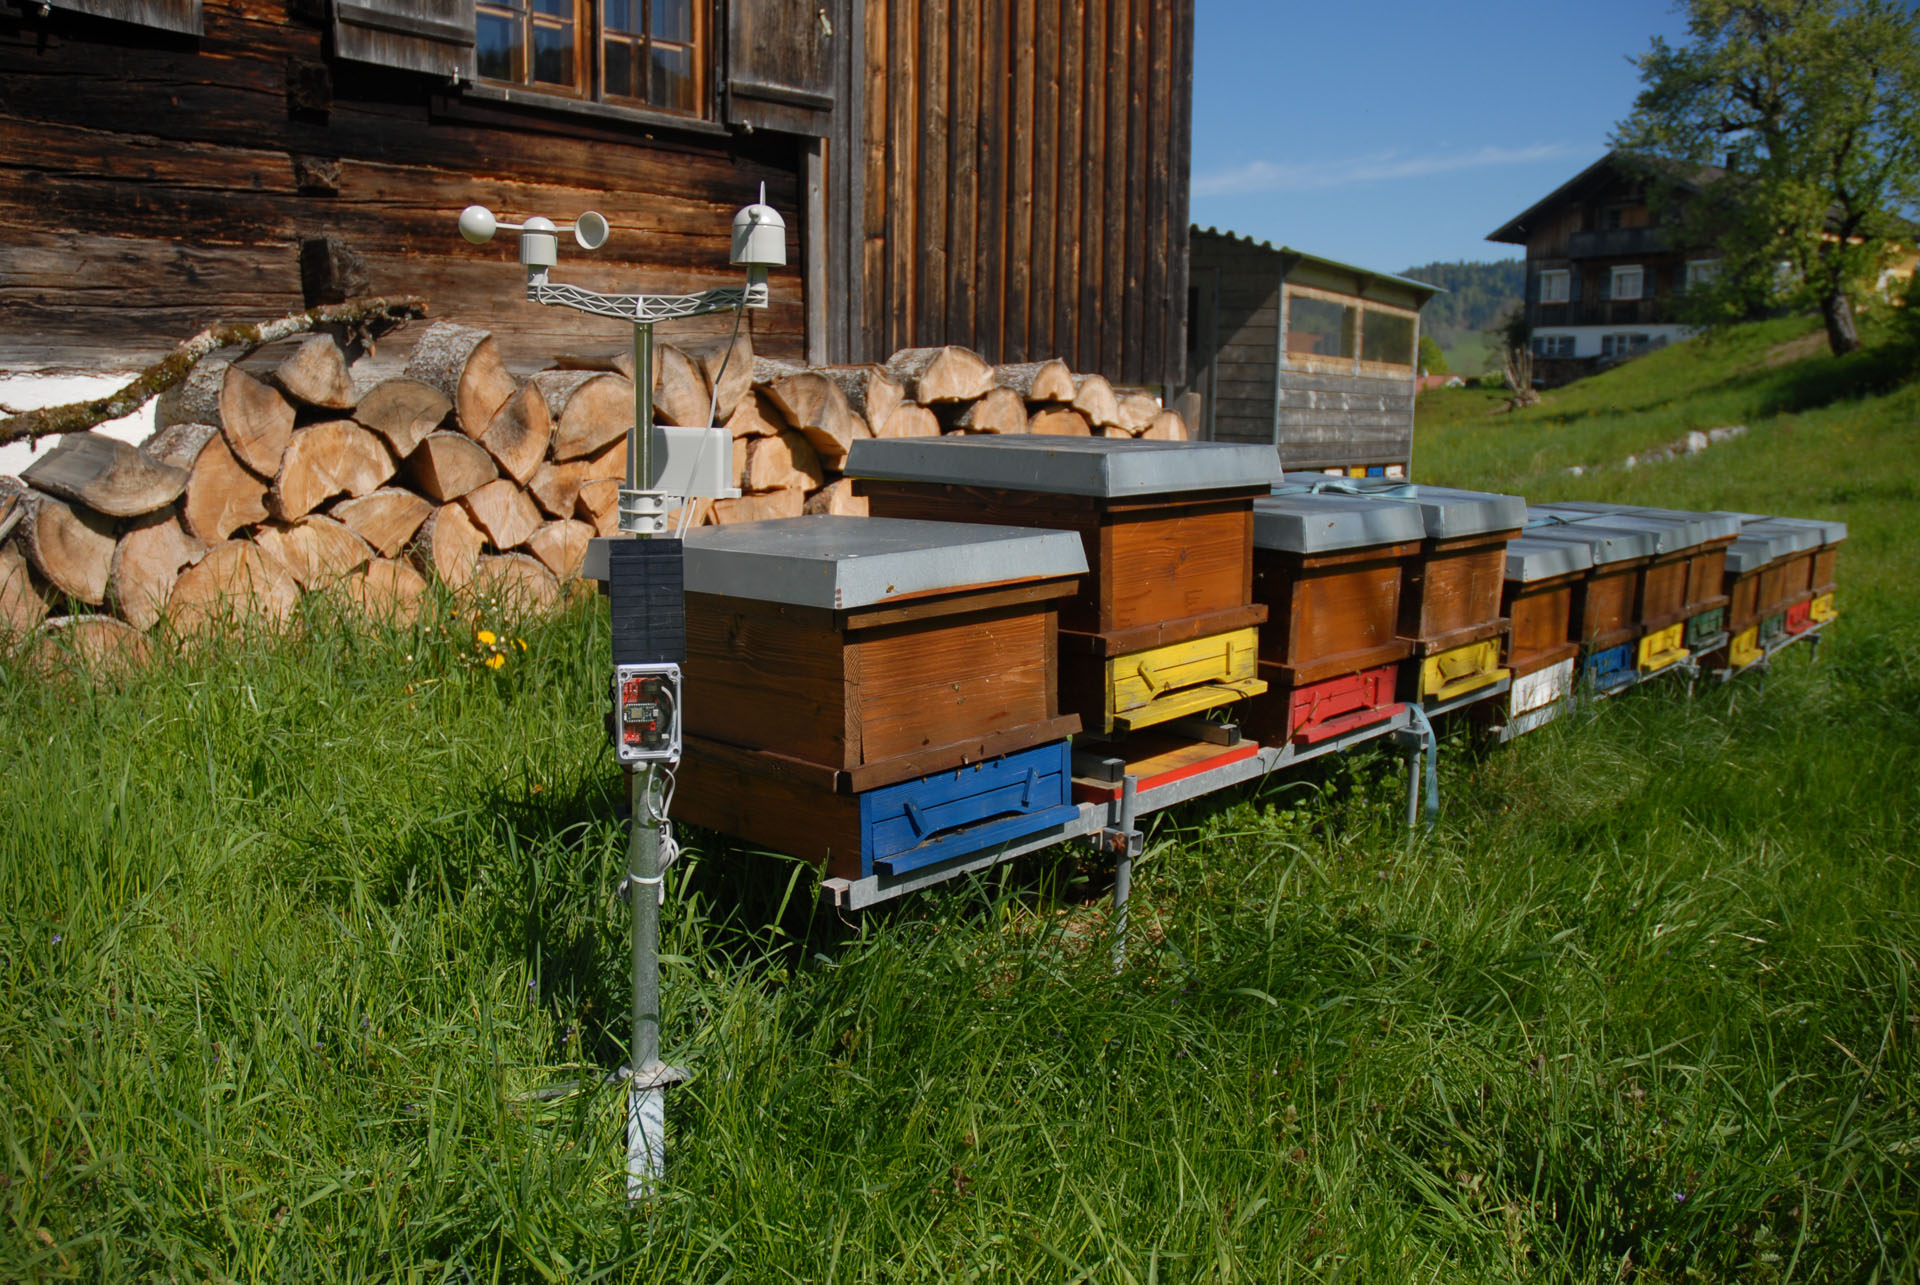
Project description
The weather station is designed to identify and analyze various connections between the weather and the development and health of our bees. Every beekeeper has probably already observed certain connections, but lacks concrete figures or records. The weather and climate sometimes have a direct impact on our bees. However, the connections are also very complex.
For example, every beekeeper has probably already observed that the outside temperature, especially in spring, has a direct impact on the brood activity of the bee colony. If it is very warm, a bee colony can care for more brood, and development progresses much faster.
The weather and climate also affect the vegetation and thus the food supply of our bees. The connections become even more complex with the forest honey flow. Honeydew is produced by Lachnids and Leccania, whose reproduction, in turn, depends on the food supply. These feed on the sap of the trees. These, in turn, require water and therefore sufficient precipitation and soil moisture.
Many beekeepers have certainly observed that particularly strong colonies collapse rapidly in late summer due to the Varroa mite. A strong colony can begin breeding much earlier in the spring than a weaker colony. This also allows the Varroa mite more development cycles and thus faster reproduction. This connection could be studied much more closely using the brood chamber temperature.
The weather also has a significant influence on the effectiveness of Varroa treatment with formic acid. The evaporation of formic acid depends primarily on temperature and humidity. The concentration of formic acid in the colony, and thus its effectiveness, therefore depends primarily on the weather over the entire period of Varroa treatment.
Many questions and observations can be better answered with the help of a weather station. An inexpensive weather station that anyone can assemble and operate should support beekeepers in their work and lead to new insights.
Project progress
The first weather station with a Wi-Fi connection has already been realized. Detailed assembly instructions for the Photon Weather Shield and the Particle Photon microcontroller board can be found here. The weather station is capable of measuring all important weather data (temperature, humidity, air pressure, precipitation, wind direction and speed, and soil moisture) and transmitting it to the cloud.4bees.at data server.
Further goals and improvements
The weather station is currently not being further developed, as it is much easier and more cost-effective to retrieve weather data from a weather service. Weather services such as OpenWeatherMap provide weather data and forecasts for any location. The weather data can be retrieved via a REST API and used in any app or program. This eliminates the need for additional hardware. The only disadvantage is that the data is not as accurate. However, this is negligible for our application.
However, further development could certainly be useful if data not provided by a weather service is to be used for nectar forecasts. A very important parameter for a good nectar forecast would certainly be soil moisture. Soil moisture has a direct influence on the host plants and thus on the reproductive potential of Lachnids and Leccania. Research and investigations into the relationship between soil moisture -> host plant -> Lachnids and Leccania -> honeydew would be very interesting and desirable.
Bee-Social.org - The social network for beekeepers
Bee-Social.org - The social network for beekeepers
Bee-Social.org is an online portal for collecting and disseminating information and knowledge about bees. The goal is to simplify and improve the work of beekeepers with their bees.
Project description
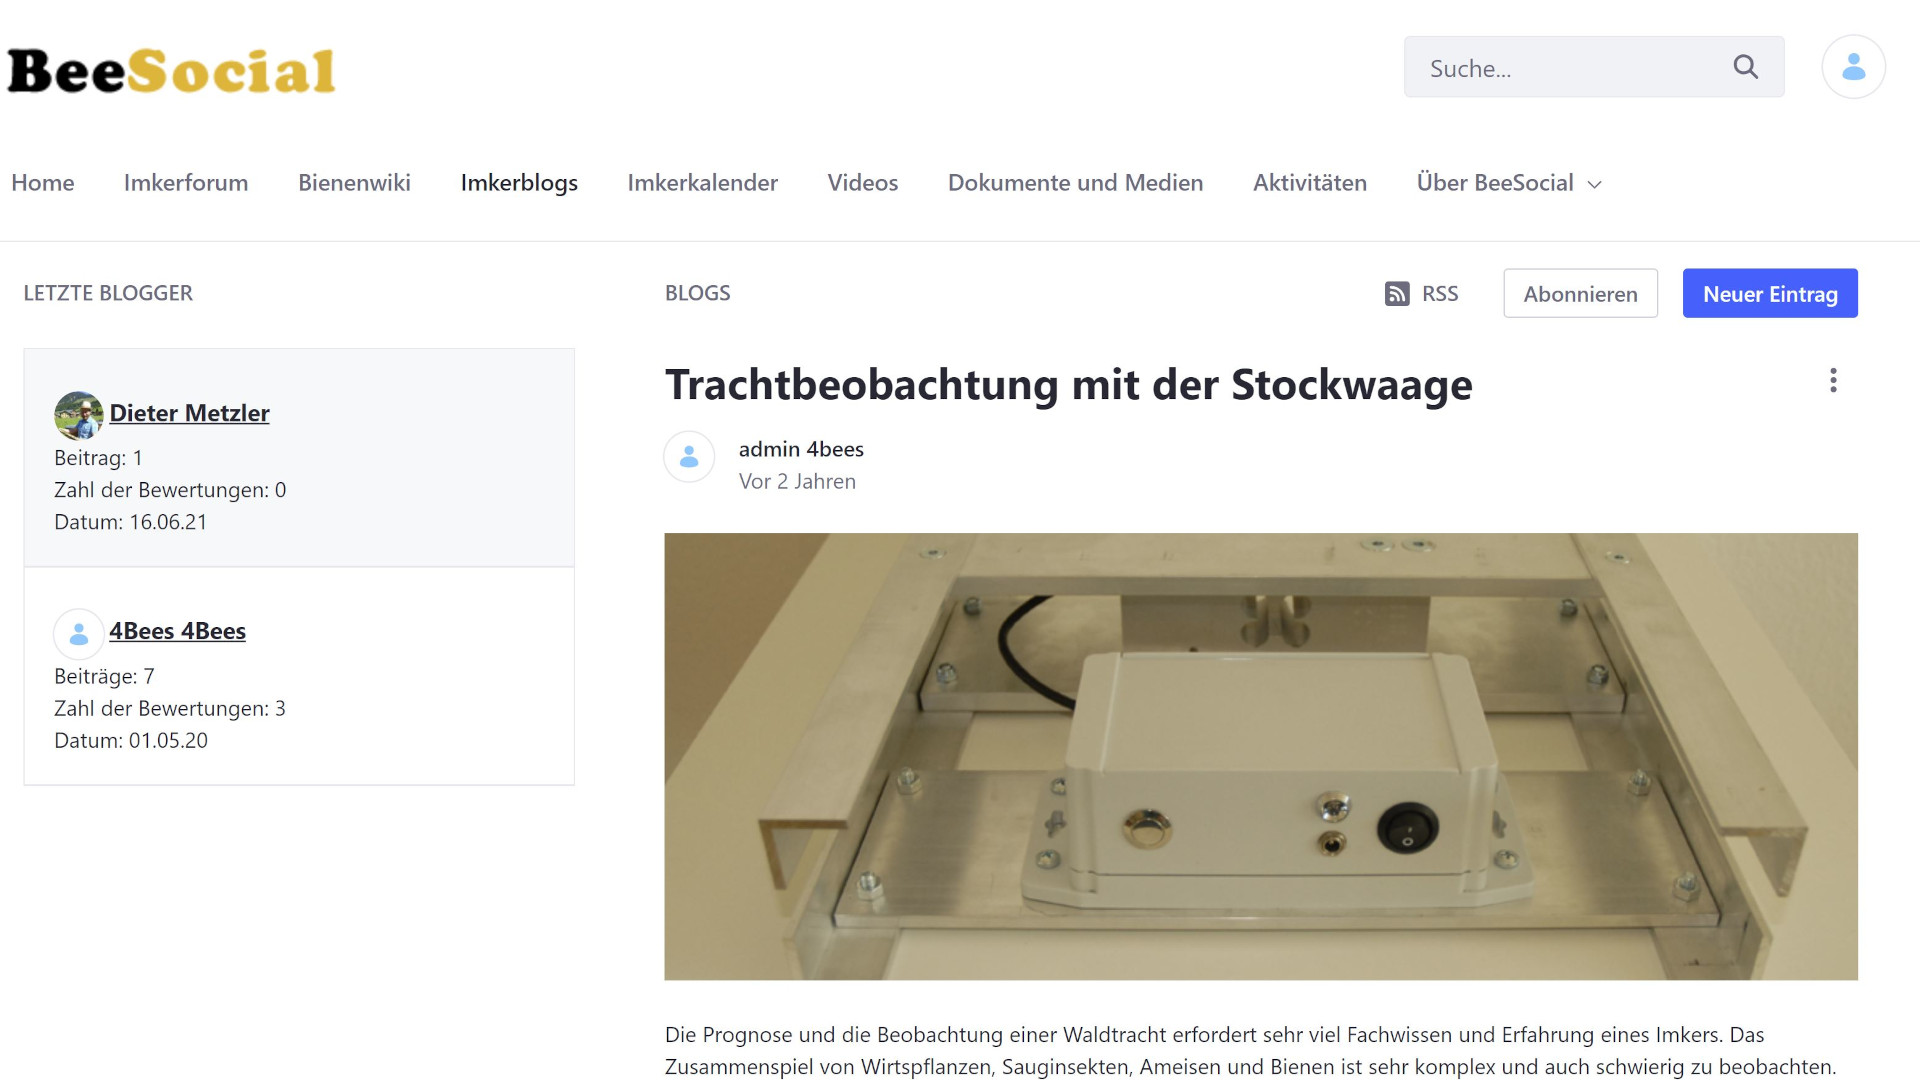
Bee-Social.org is a social network created by beekeepers for beekeepers. Information and experiences related to bees can be easily collected and shared. Innovative ideas and new findings can be discussed and shared using various features. Beekeepers are connected through social networking features. Below, I would like to provide a brief overview of the most important internet technologies used by Bee-Social.org.
- Beekeeper Forum - A well-moderated forum allows every beekeeper to easily ask their questions and concerns to other beekeepers. The answers and discussions are also visible to others and can be helpful for everyone in their work with bees.
- Beekeeping blogs - Bee-Social.org's blog functionality allows every user to create and share their own posts. Social media buttons allow posts to be quickly and easily shared on other social networks. Other users can also comment on the topic using the comment function.
- Documents and Media - Easily store and publish various types of documents, videos, and photos here. Permissions can be set so that others can read and download these files.
- Social Network - Registered users can connect with other members. They can follow them or connect as friends. This makes it very easy to maintain and manage contacts.
These features are already available. However, the Bee-Social.org platform will continue to be adapted to the latest internet technologies. Please use the platform and contribute to a lively exchange of knowledge among us beekeepers.
How can I support this project?
Visit Bee-Social.org and use its features to collect and share knowledge.
Bee garden - How can I do something good for our bees?
Bee garden - How can I do something good for our bees?
Help our bees by growing a variety of flowers in your own garden. The increase in monoculture areas and the disappearance of diverse flower meadows are making it increasingly difficult for our bees to find food. Parks and gardens with a high level of biodiversity are becoming increasingly important for our bees.

Project description
The Bee Garden project is a collection of plants that are particularly important for our bees' food supply. The plants are described with particular emphasis on their nectar and pollen content. The benefits of the plants for us humans will also be briefly presented. For example, many herbs can be used in the kitchen or as medicinal plants. Berries and fruit provide us with nutrients and vitamins. And many other flowers are a feast for the eyes.
To ensure that the plants thrive in our garden, a few gardening tips are also included. Care and propagation are briefly described. The right soil and location usually play a crucial role.
In the forum, you can describe your favorite plant for bees and provide valuable tips for hobby gardeners. This way, it can quickly spread to many gardens and serve as a valuable food source for our bees.
As soon as we have received enough information and photos of your favorite plant, it will also be included in the bee garden on summsumm.com.
DIY WLAN-Stockwaage
DIY WLAN-Stockwaage
Die DIY WLAN-Stockwaage ermittelt stündlich das Gewicht des Bienenvolkes und übermittelt den Wert über das WLAN-Netz an den cloud4Bees-Datenserver. Der Datenserver speichert die Daten in einer Datenbank und bietet verschiedene Möglichkeiten zur Darstellung der Daten.
Projektbeschreibung
Eine online Stockwaage ist ein ideales Hilfsmittel für jeden Imker. Damit ist er über die Trachtverhältnisse am Bienenstand jederzeit informiert und er kann sich gewisse Kontrollen am Bienenvolk ersparen. Er weiss über die Futterreserven im Bienenvolk Bescheid, ohne die Bienen unnötig zu stören. Im Winter ist es sogar möglich indirekt über den Futterbedarf, Rückschlüsse über die Bruttätigkeit zu ziehen.
Warum soll ich mir eine Stockwaage selber bauen?
Am einfachsten ist es natürlich, sich eine fertige Stockwaage zu kaufen. Allerdings hat dies auch seine Nachteile. Schon der relativ hohe Preis kann viele Imker davon abhalten, sich eine sehr hilfreiche Stockwaage anzuschaffen. Durch das Einbringen der eigenen Arbeitsleistung kann mindestens ein Drittel der Kosten eingespart werden. Es ist möglich eine qualitativ hochwertige Stockwaage zu einem Preis von €250.- bis 350.- zu bauen. Der Arbeitsaufwand ist dabei sehr überschaubar.
Für mich persönlich zählt aber das Erfolgserlebnis und die Freude, wenn ich etwas neues Lerne und selber Baue, aber noch wesentlich mehr als das ersparte Geld. Ich bin auch erst dann in der Lage die Stockwaage meinen Bedürfnissen anzupassen und Verbesserungen vorzunehmen. Dadurch kann ich die Stockwaage beispielsweise sehr einfach an technologische Entwicklungen anpassen und muss mir nicht gleich eine neue Waage kaufen, wenn sich meine Anforderungen ändern. So ist es auch sehr einfach eine WLAN-Stockwaage in eine GSM-Stockwaage umzubauen. Dazu muss ich lediglich einen Bauteil auswechseln und den Programmcode etwas abändern.
Im Folgendem erkläre ich den Aufbau und die Programmierung einer Stockwaage in ein paar einfachen Schritten.
Aufbau und Hardware
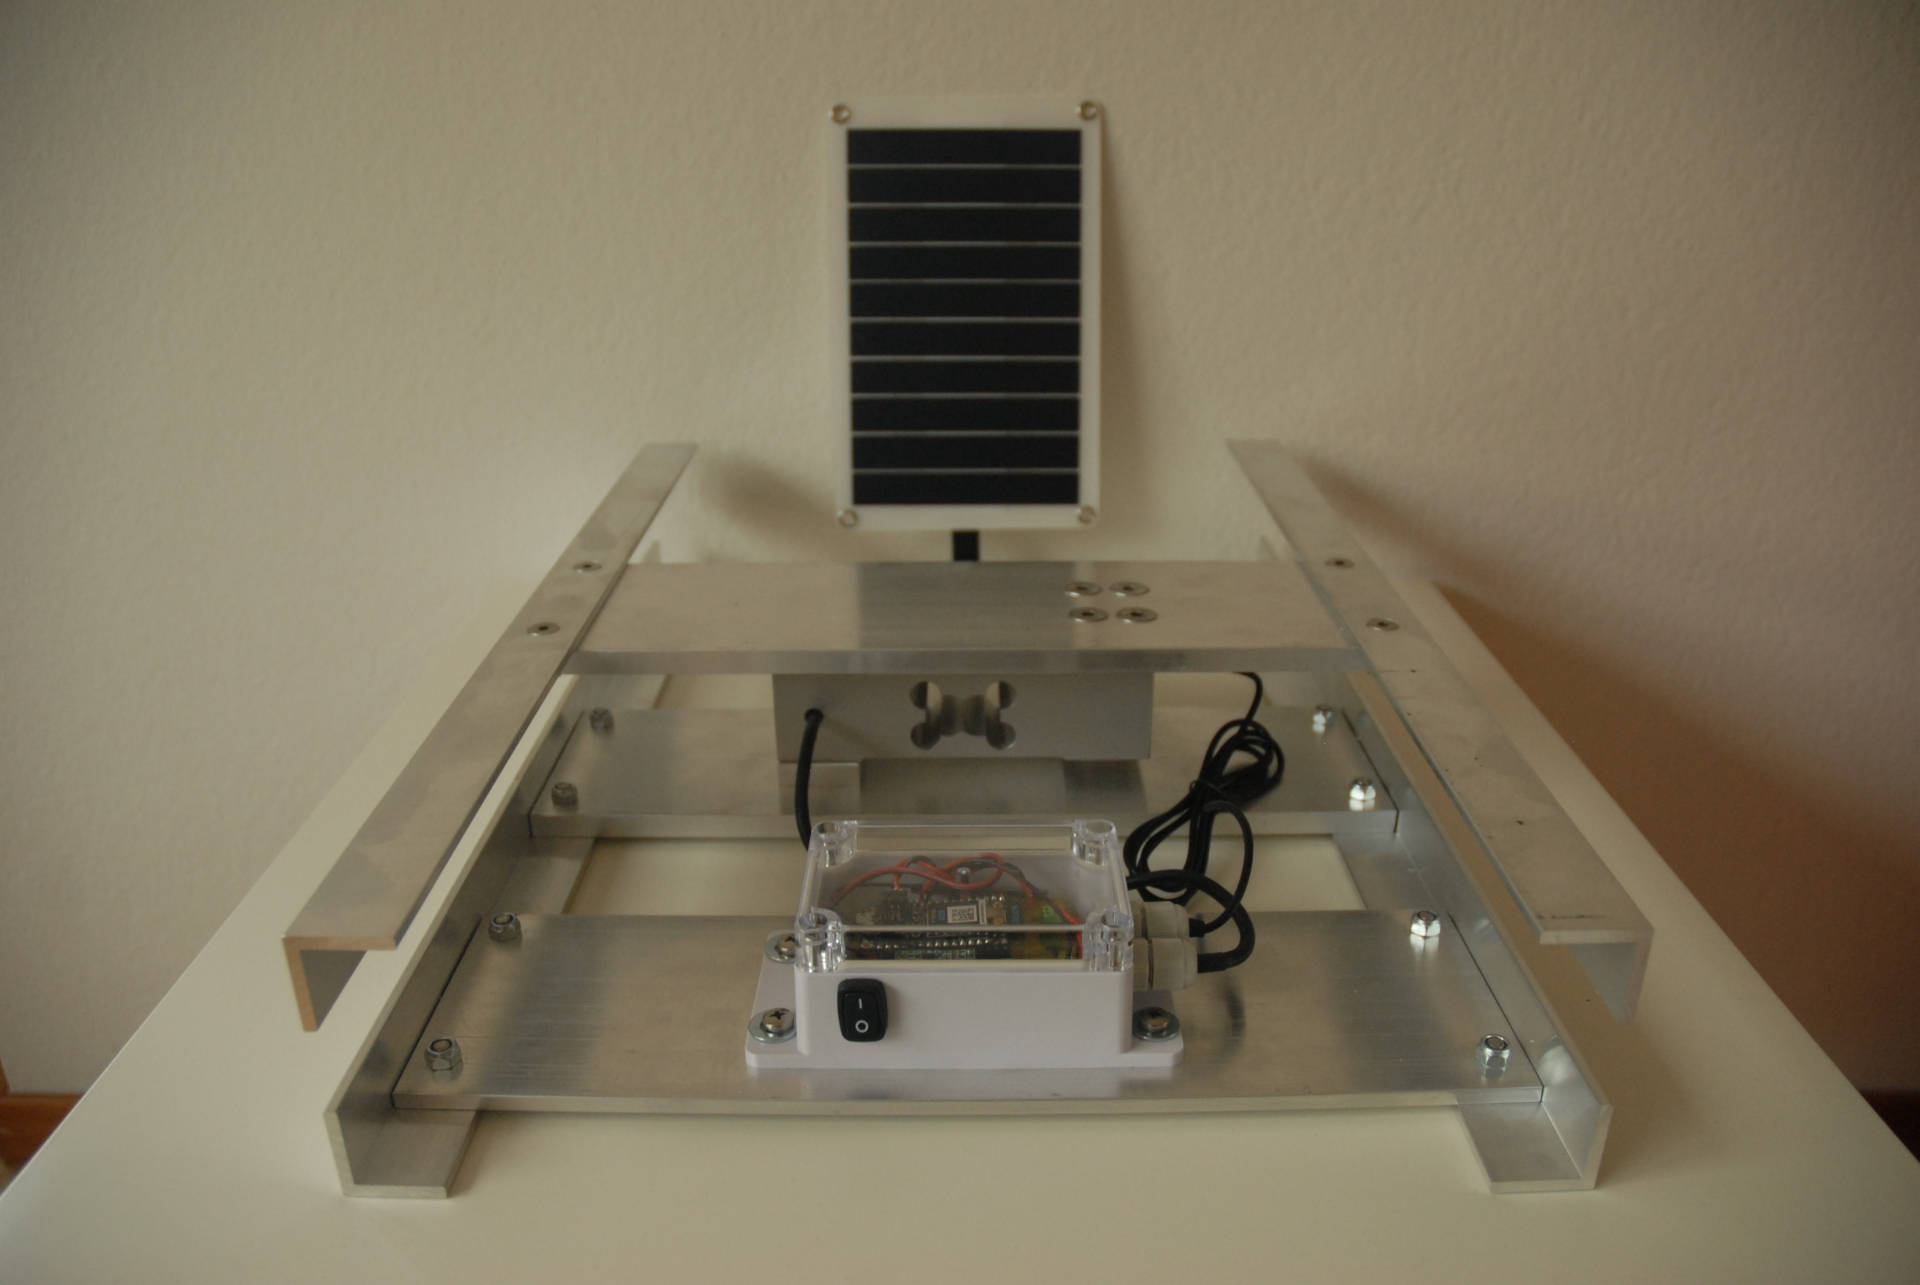
Zur Ermittlung des Gewichtes eines Bienenvolkes und Übertragung der Werte über das WLAN-Netz sind im wesentlichen 3 Bauteile (Wägemodul, HX711-Messverstärker und Particle Argon – Microcontrollerboard) notwendig. Die weiteren Bauteile sind für die Stromversorgung notwendig. Damit die Stockwaage auch im Aussenbereich betrieben werden kann ist noch ein wasserdichtes Gehäuse notwendig.
Wägemodul
Das Wägemodul besteht aus einem Aluminiumgestell und einer Wägezelle. Die Wägezelle ist ein Aluminiumblock mit einem Dehnungsmessstreifen (DMS). Die Wägezelle benötigt eine Versorgungsspannung und liefert eine Signalspannung die sich proportional mit der Belastung der Wägezelle verändert.

X711-Messverstärker
Das HX711 Modul ist ein Messverstärker mit integriertem A/D-Wandler. Damit kann die Signalspannung der Wägezelle verstärkt werden und direkt an das Microcontrollerboard weiter gegeben werden.

Particle Argon – WLAN-Microcontrollerboard
Das Particle Argon ist ein Microcontrollerboard mit WiFi-Modul und einem integriertem Laderegler. Dieser emöglicht das Laden der LiPo-Batterie mittels 5V Solar Panel.

Stromversorgung
Für die Stromversorgung ist eine 3.7V Lipo (z.B. 2000mAh), ein USB-Kabel und ein 5V/10W Solar Panel notwendig. Mittels Ein-/Aus-Schalter kann die Stromversorgung unterbrochen werden.
|
|
|
|
|
Breakoutboard
Das Breakoutboard ermöglicht das richtige Verbinden aller Bauelemente ohne zusätzliche Kabel oder Lötarbeiten. Die Bauelemente werden einfach über Steckverbindungen miteinander verbunden. Zusätzlich besteht noch die Möglichkeit, zwei Temperatur- und Luftfeuchtigkeitssensoren über eine Steckverbindung anzuschliessen.

Wasserdichtes Gehäuse
Um die DIY WLAN-Stockwaage auch im Aussenbereich sicher betreiben zu können, ist ein wasserdichtes Gehäuse notwendig. Damit sind alle elektronischen Bauteile sicher geschützt.

Installation und Programmierung
Damit die WLAN-Stockwaage die Messwerte an den cloud4Bees-Datenserver senden kann sind noch drei Schritte durchzuführen:
-
Das Particle Argon mit der Particle Cloud verbinden
-
Das Programm auf das Particle Argon überspielen
-
Die Stockwaage mit dem cloud4Bees-Datenserver verbinden und kalibrieren
1.) Das Particle Argon mit der Particle Cloud verbinden
Die Setup-Seite von Particle führt dich Schritt für Schritt durch das Setup. Gehe zur Seite: https://setup.particle.io/
Als erstes musst du ein Konto erstellen oder dich einloggen, wenn du bereits ein Konto erstellt hast.
Dann kannst du auf der Setup-Seite dein Gerät (Argon) auswählen. Es wird noch kurz angegeben welche Teile du benötigst (Argon, USB-Kabel und Antenne). Auf der nächsten Seite kannst du dir den Link für die Particle-App auf dein Smartphone schicken lassen.
Jetzt kannst du die App auf deinem Smartphone installieren und öffnen. Du kannst dich nun in der App anmelden und das Setup durchführen.
Wenn alles funktioniert hat erscheint das Argon in deinem Konto. Öffne dazu in einem Browser deine Konto: https://console.particle.io/devices
2.) Das Programm auf das Particle Argon überspielen
Zur Programmierung des Particle Argon stehen dir zwei Möglichkeiten zur Verfügung. Entweder du installierst die Particle Workbench oder du programmierst das Particle Argon über die Web IDE.
Für einen schnellen Einstieg würde ich die Web IDE empfehlen.
Das Programm für die WLAN-Stockwaage kannst du einfach über den folgenden Link in deine Web IDE laden: https://go.particle.io/shared_apps/61a0aad8de87cd0008e4d399
Klicke auf «COPY THIS APP» um das Programm in deine Web IDE zu kopieren.
Jetzt musst du nur noch dein Gerät (Argon) auswählen und sobald es mit der Particle Cloud verbunden ist (LED pulsiert in Cyan) kannst du das Programm auf das Argon «flashen». Der «Flash-Button» befindet sich links oben in der Web IDE.

Beim ersten Mal flashen kann es recht lange dauern, da auch das Device OS entsprechend der Firmware auf die Version 2.2.0 upgegradet wird. Nach dem erfolgreichen «flashen» des Programmcodes wird das Argon neu starten. Die LED beginnt zunächst grün zu blinken, das Argon versucht sich mit dem WLAN-Netz zu verbinden. Die LED wird dann kurz schnell grün blinken (Argon ist mit dem WLAN-Netz verbunden) und dann in Cyan pulsieren (Argon ist mit der Particle Cloud verbunden). Was als nächstes im Programm abläuft sehen wir sobald wir das Particle Argon über die serielle Schnittstelle mit dem Computer verbunden haben und einen seriellen Client gestartet haben. Dazu mehr im nächsten Schritt.
3.) Die Stockwaage mit dem cloud4Bees-Datenserver verbinden und kalibrieren
Für die Stockwaage muss nun ein Kanal auf dem cloud4Bees-Datenserver erstellt werden. Erstelle ein Konto und melde dich an. Klicke auf «New Channel» und erstelle einen neuen Kanal. Hier kannst du einen Namen für den Datenkanal angeben und eine Beschreibung. Durch das Setzen eines Häkchen im Feld «Make Public?» kannst du den Datenkanal auch für andere sichtbar machen.
In das Feld «Field 1» schreibst du Gewicht in kg. In das Feld «Field 2» kannst du noch Spannung in V schreiben, falls du dich für den Ladezustand der Batterie interessierst.

Jetzt kannst du den Tab «API-Keys» wählen. Der «Write API Key» wird im nächsten Schritt für das Setup der Stockwaage benötigt.
Für die Konfiguration der Stockwaage benötigen wir die Möglichkeit einer seriellen Eingabe. Dafür verwenden wir das Programm «Putty». Putty ist ein freier SSH und telnet client, entwickelt von Simon Tatham.
https://www.chiark.greenend.org.uk/~sgtatham/putty/latest.html
-
Download putty.exe
-
Klick auf putty.exe, um Putty zu starten

Wir müssen jetzt noch herausfinden auf welchem Port das Particle Argon mit dem Computer kommuniziert. Dazu verbinden wir das Particle Argon mit einem USB-Kabel mit dem Computer und öffnen den Gerätemanager in Windows. Hier sehen wir dass es sich um den Port COM14 handelt. Dies müssen wir in Putty unter «Serial line» entsprechend anpassen.

Bevor wir mit der Konfiguration der Waage beginnen, stellen wir noch ein uns bekanntes Gewicht (z.B. Wassereimer, Hantelscheibe,…) zur Seite.
Konfiguration starten:
-
Reset Button auf dem Particle Argon drücken, damit das Programm neu gestartet wird.
(Warten bis das Argon mit dem PC verbunden ist → akustisches Signal) -
Serielle Verbindung starten (den Open-Button von Putty klicken)
Über die serielle Eingabe von Putty müssen nun folgende Eingaben gemacht werden:
(Der Konfigurationsdialog beginnt sobald sich das Argon mit der Particle Cloud verbunden hat – Onboard LED pulsiert in Cyan)
-
Wollen Sie das Setup für die Stockwaage durchführen? j/n
→ j -
Geben Sie den API_Key Ihres Datenkanales ein: XXXXXXXXXXX
-
Geben Sie jetzt ein bekanntes Gewicht auf die Stockwaage (z.B 10 kg),
und geben Sie dieses über die serielle Eingabe ein (z.B. 10)
→ 10
-
Wollen Sie den Scalefactor und den Offset auf dem EEPROM speichern? j/n
→ j -
Sie haben das Setup der Stockwaage erfolgreich abgeschlossen. Das Programm wird jetzt weiter ausgeführt. Es werden jetzt alle Messwerte ermittelt und in den angegeben Datenkanal geschrieben. Danach wechselt die Stockwaage für eine Stunde in den Sleep-Mode, um Strom zu sparen.

-
Wenn beim Setup der Stockwaage eine falsche Eingabe gemacht wurde (z.B. Tippfehler bei der Eingabe des API-Keys), so kann dieses erneut durchgeführt werden. Einfach Reset-Button drücken und die serielle Eingabe von Putty öffnen und dem Eingabedialog folgen.


